
Advanced Photography
Where the basics turn into control
The natural next step once you have a camera in your hands and are starting to get the hang of it. It does not begin with advanced technique. It begins where the essentials left off, and builds.
For years this was called the Intermediate to Advanced class, and that is still the more honest description of it. You come out of the essentials and you step into intermediate to advanced teaching, in that order, without a jump in between. It takes the mechanics you already half know and teaches them properly, in depth, until you are the one making the decisions rather than the camera.
By the end of it you will be able to pick up your camera, work in full manual without thinking about it, and go and make photographs that are genuinely interesting rather than merely correct.
The lesson opens on YouTube. Enrolling takes you to artphotographyacademy.com.
First, the obvious worry
Do not let the word advanced put you off
It is the wrong word, honestly. It suggests you need to already be good, and that is not what this course is or who it is for.
You do not arrive on day one and start doing difficult things. Week one opens with a revision of the essentials, then goes back over the same ground properly and in depth. The exposure triangle, the relationship between shutter, aperture and ISO. What an f stop actually is. How to make an exposure correctly rather than approximately.
Then depth of field, what it genuinely is and how you control it. Then how to work the camera in full manual, so that you take charge of the picture instead of handing that job to an automatic or program mode.
None of that is advanced. It is the proper grounding, and almost nobody has been given it. What makes the course advanced is not where it starts, it is where it takes you by week six.
Where you should be starting from
You have a DSLR or a mirrorless camera and you are beginning to get the hang of it. You have either been through Photography Essentials, or you understand the foundational basics well enough to follow along. That is it.
If you are not there yet, do Essentials first. It is short, and it is priced so money is not the reason anybody skips it.
What it teaches
Nine parts, and every one of them builds on the last
Nothing here is out of order and nothing assumes a leap. Each lesson ends with a practical application which you post to your class group, and Martin, Samantha and the creative advisors respond to it.
Week one
The mechanics, properly this time
A revision of the essentials, then ISO, shutter and aperture in real depth. The exposure triangle, the f stop, and how to make an exposure correctly. Low light and night photography, and your first assignment.
Week two
Reading light rather than guessing at it
Light meter modes, exposure compensation, the grey card exercise, histograms and spot metering. This is the week people stop guessing and start knowing.
Week three
Colour and depth
White balance and colour temperature settled at the time of capture rather than corrected afterwards. Then depth of field, what it actually is and how you control it deliberately.
Week four
Movement and contrast
Freezing and blurring, camera shake, panning, tracking and intentional camera movement, so you can work with motion instead of avoiding it. Then contrast control and exposure ratios across three lessons.
Week five
Composition
The art of simplicity, centre of interest, unequal visual tension, power points, visual direction and lead in lines. Guidelines rather than rules, and the difference between the two matters a great deal.
Week six
Visual communication
Making a photograph that actually speaks. Storytelling through format, camera angle and proximity, and attraction to visual elements. This is where a picture stops being a record and becomes a statement.
Week seven
Colour psychology and the digital negative
The psychology of colour, perceptual depth and space, the power of RAW, and the difference between developing a file and editing pixels.
Part eight
Developing and processing a RAW file
Adobe Bridge in two parts, then developing a RAW file across three lessons. Camera Raw treated as a darkroom rather than a rescue kit, plus asset management and how a portfolio is structured.
Part nine
In closing
Auto and program modes finally put in their proper place, the Magic Twelve Challenge, and where to take your photography from here.
Six weeks, or carry on at your own pace. Every lesson stays in your library.
Before you spend anything
Watch him teach, and decide for yourself
You have no reason to take any of this on trust. So do not. Martin teaches a great deal of this material free on YouTube, and the fastest way to know whether his way of explaining things suits you is to go and watch some of it.
From 77 Google reviews of the Martin Osner Photography School. Those are for the school as a whole, the workshops, the retreats and the teaching, rather than for this course on its own. Read them yourself.
 40 min
Composition in Photography: The Part Nobody TeachesWeeks five and six of the course, in the open. 59,000 views and 741 comments, which tells you how badly this is needed.
40 min
Composition in Photography: The Part Nobody TeachesWeeks five and six of the course, in the open. 59,000 views and 741 comments, which tells you how badly this is needed.
 32 minThe Expensive Lie Every Photographer BelievesThe one about gear, and why it is almost never the thing holding you back.
 21 minLifting the Emotional Veil: Objective Vision and CompositionHow to look at a scene objectively before you raise the camera. This is week five thinking.
 13 minStudio Photography Lighting TechniqueLight shaped deliberately rather than found. The same control taught in week four.
If those are useful to you, the course is the same teaching in order. That is the honest difference. YouTube gives you the ideas as they occur to him. The course gives you all of it, in sequence, with a practical application after every lesson and somebody looking at what you produce.
See the whole channel on YouTube
These open in a new tab, so this page stays where it is.
Week four
The part almost nobody teaches
Contrast control and exposure ratios, decided at the moment of capture rather than pulled back afterwards.
Three lessons sit on this, and it is the part people come back and mention years later. Not because it is difficult, but because almost nobody is ever shown it, and it is quietly responsible for more disappointing photographs than anything else.
Most teaching treats contrast as something you fix in software. It is not. By the time the file is open the decision has already been made for you, and what is gone is gone. On film there was no other option, which is exactly why photographers who learned then know how to do it, and most people who learned since were never told.
Where it came from
Written for a lecture room, not for the internet
Almost every photography course online was written for the internet. This one was written to be stood up and delivered to a room of full time students who were on their way to becoming professionals.
That is why it is thorough, why it is in the order it is in, and why it has survived three complete changes of technology without needing to be reinvented. The mechanics of photography did not change when film did.
This course is written, for film. Everything in it had to be right at the moment of exposure, because there was no second chance and nothing to fix it with afterwards.
Martin founds the National College of Photography. A night school programme, and alongside it a year and a half full time programme for people intending to turn professional. On film, with no safety net.
The college is acquired by AdvTech, under Vega School of Branding. The course is rewritten for the new programme. Graduates go on to work commercially across South Africa, and students travel from abroad to attend.
Martin rewrites it again, now fully digital, and teaches it from his own studio in Hout Bay, Cape Town.
Onto Zoom, and now completely online, adapted for DSLR and mirrorless. It is taught elsewhere by other people working from these modules. Here you do it with the person who wrote it.
Why it is taught this way
Thirty years of being paid only if the client was happy
While he was teaching, Martin ran a working commercial studio. Portrait, fashion, still life and advertising, including jewellery and coffee, which are two of the hardest subjects there are.
On film, with no Photoshop, no focus stacking and certainly no AI. If the client was not happy with what they received, they did not pay. Every technique in this course had to work first time, under pressure, for money. That is the difference between practical teaching and theoretical teaching, and you can hear it in the way it is explained.

Jewellery advertising
On film, no focus stacking and no compositing. The depth of field and the colour of the light had to be decided before the shutter opened.
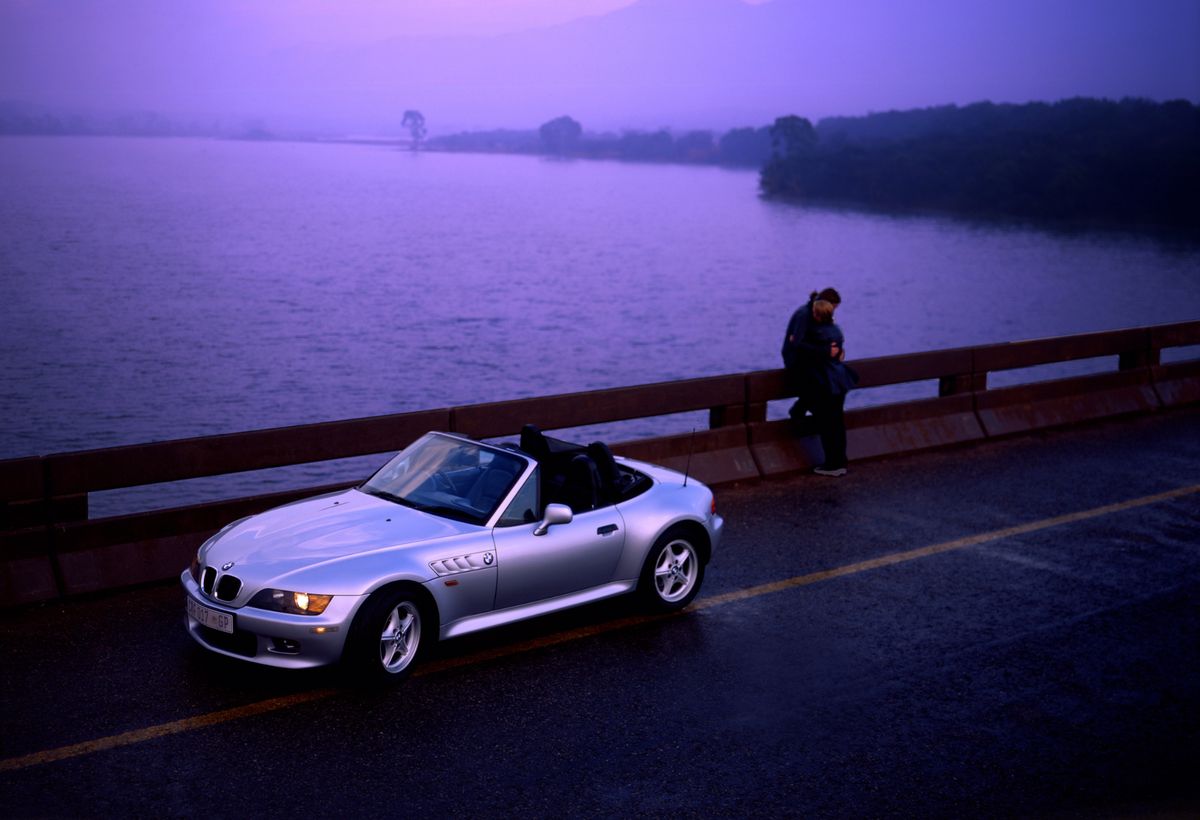
BMW Z3 commercial
Last light, a wet road, and a car that still has to read as silver. Colour temperature judged at the moment of capture.

Cocktail campaign
A pour caught in a fraction of a second, lit so that liquid reads as liquid. One frame, one chance, and a client waiting.
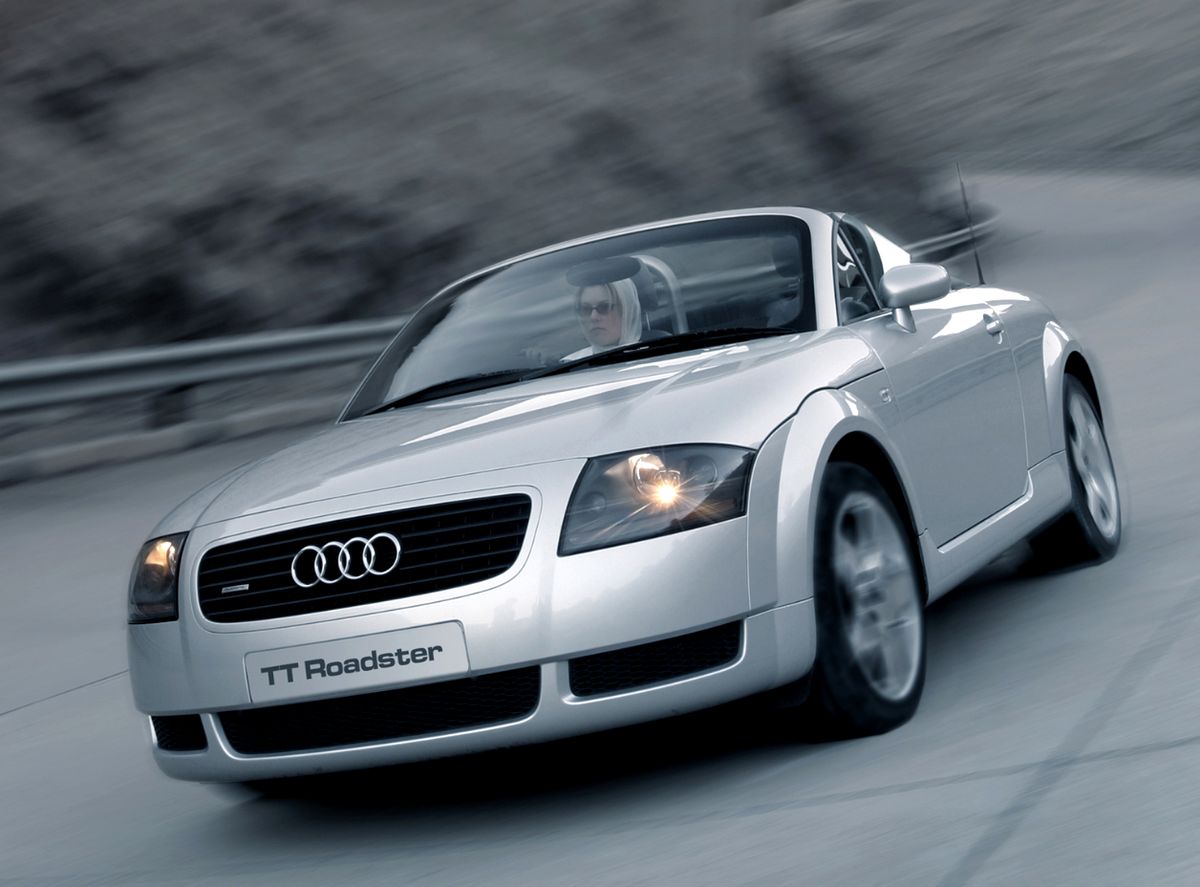
Audi TT Roadster
Sharp subject, dissolved background, done in camera. The tracking and panning lessons in week four are this technique.

Delheim campaign
A dark bottle on a dark ground. Almost all of the work here is in the shape of the light and the control of contrast.
Somebody who was already good
“I no longer am a gunslinger shooting from the hip”
Mike Evans had been photographing for six or seven years before he took this course. Portraits, sport, some landscape. He was not a beginner looking for the basics, which is exactly why what he says is worth reading.
“I would do a shoot, go out, maybe take two hundred images, and keep one or two. Now I shoot maybe ten or twenty, and I will keep most of those.”
“I have taken fewer images, but the images I am taking are better than the ones I would have taken a year ago. I like being selective. It is a big change for me. A big, big change.”
“His critiques are always well intentioned, but they make you work a little bit. You work harder to produce a better result.”
Mike Evans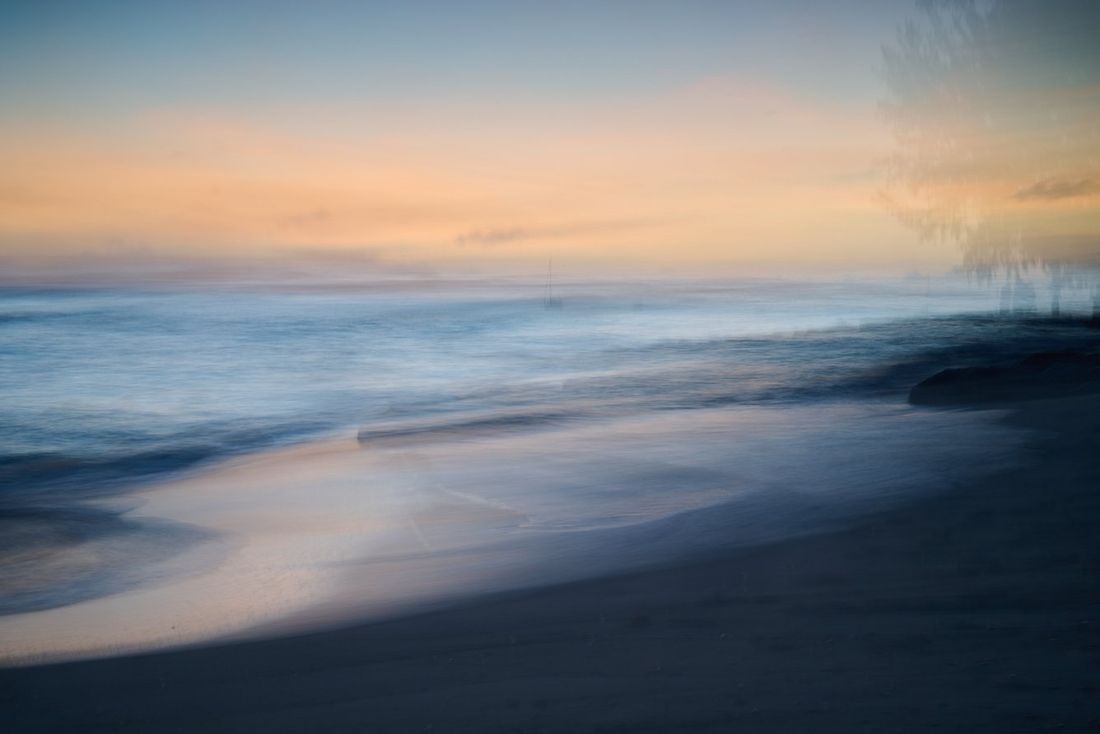
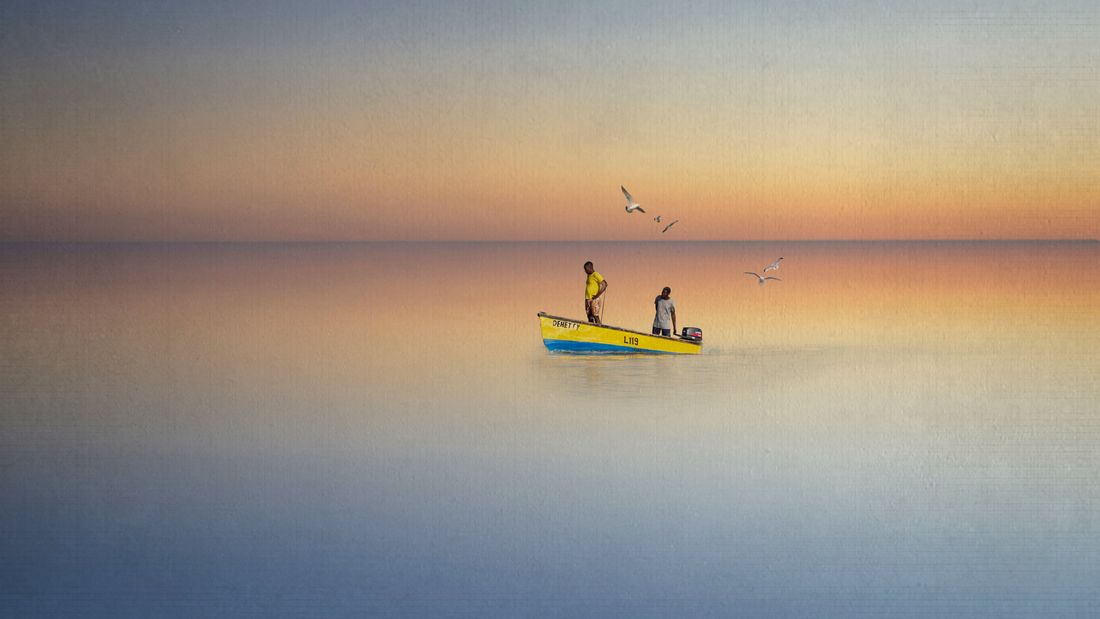
Simplicity
Two figures, a boat, and almost nothing else. Week five, the art of simplicity.
Expression
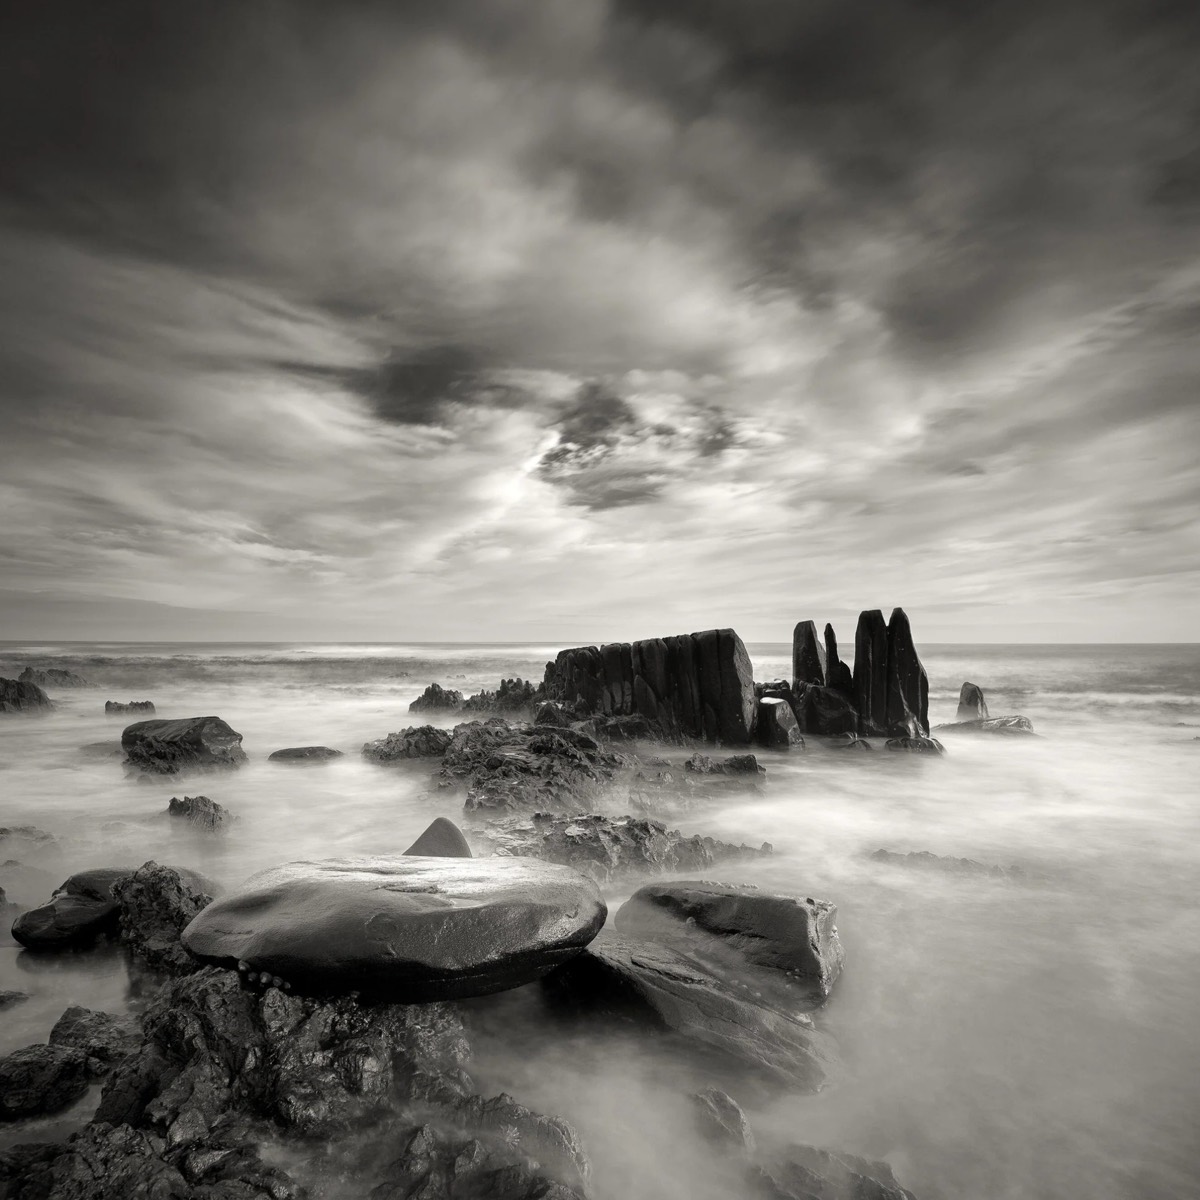
A long exposure on the shore. Week four, the expression of movement.
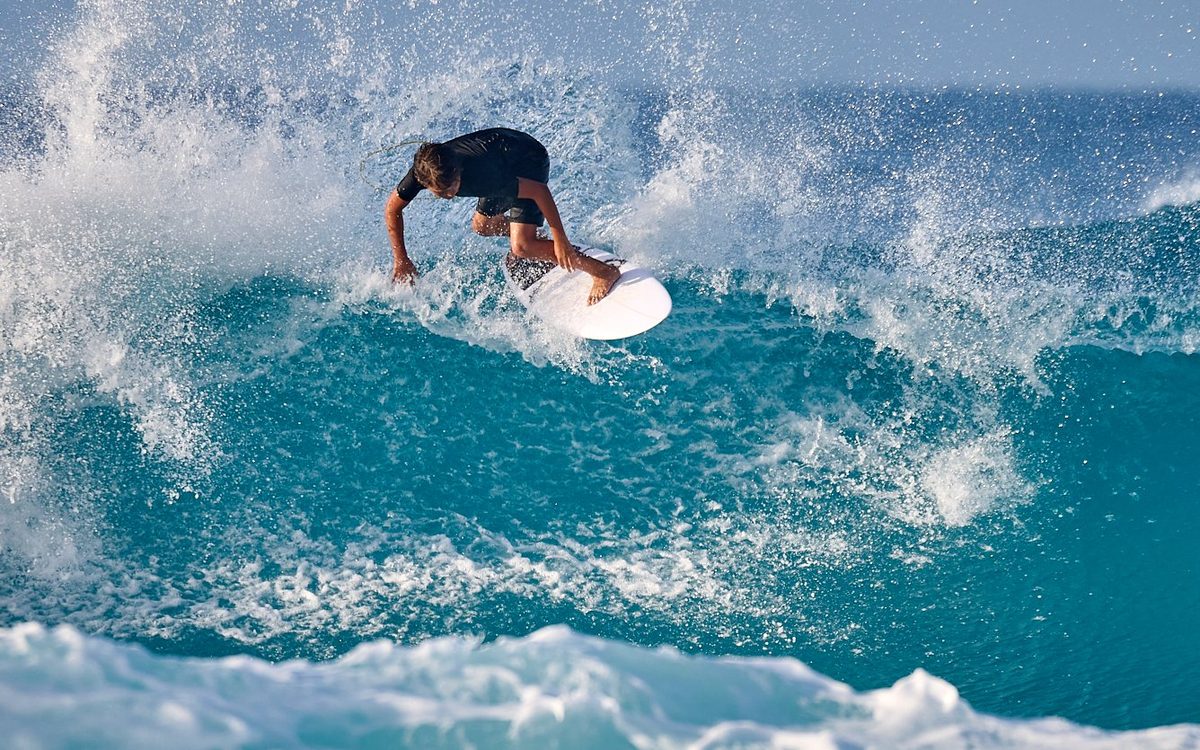
Impact
Movement frozen at the moment it matters. Week four, freezing motion.
These are not pictures Mike made afterwards. They are his own project pictures, taken during the course as he worked through each technique.
Where this leaves you
In control, and then somewhere you did not expect
At the end of six weeks you will be able to pick up your camera, work it in full manual without thinking about it, and make deliberate decisions about light, depth, movement and composition before you press anything.
That is what the course sets out to do, and for a good many people that is enough. Confident, in control, and finally making photographs that are interesting rather than merely correct.
But something else happens often enough that it is worth saying out loud. Somewhere around the composition and visual communication weeks, once people can genuinely control the situation and are producing work that others stop and look at, the pull towards art and fine art photography becomes real. It was not the plan when they enrolled. It becomes the plan.
So this course is not always a means to an end. Quite often it turns out to be the beginning of something completely fresh.
Before you decide
The questions people actually ask
Tap any question to open its answer.
I am not sure I am advanced enough. Am I?
Almost certainly yes. If you have a DSLR or mirrorless camera and you are starting to get the hang of it, you are the person this was written for. Week one opens with a revision of the essentials and builds from there. Nothing is assumed and nothing leaps.
Do I need to have done the Essentials course first?
Not if you can already set an exposure in full manual and read a light meter. If that gives you pause, do Essentials first, it is short and it is priced so money is not the reason anybody skips it.
What camera do I need?
Any camera with a full manual function, which is very nearly every DSLR and mirrorless camera sold today. An entry level body is completely fine. This is not a course about your particular camera.
How long does it take?
Six weeks, week by week, or carry on at your own pace. Every lesson stays in your library for good.
Do I get feedback on my work?
Yes, and this is the part people say changed the most. Every lesson ends with a practical application. You post the result in your class group and Martin, Samantha and the creative advisors respond to it.
Is it taught live?
No, the lessons are pre-recorded so you work at your own pace. The live part is the class group and the feedback, which is where the teaching actually lands.
Do I need Photoshop?
No. The developing lessons use Adobe Bridge and Adobe Camera Raw, and Lightroom will do the same job. This part of the course is about developing a RAW file, not editing pixels.
Will it help my portfolio?
Yes, deliberately. Asset management and portfolio structure are part of it, and because every lesson ends with a practical application you finish with a body of new work rather than a folder of notes.
Can I see the teaching before I pay?
Yes, and you should. A great deal of this material is taught free on Martin’s YouTube channel. Watch a couple of the long ones and you will know within twenty minutes whether his way of explaining things suits you.
Do I get a certificate?
Yes. You can request one from the Art Photography Academy once you have completed all the lessons and assignments.
When you are ready
Six weeks, and then it is yours for good
Both take you to artphotographyacademy.com, where the course is taught and your library lives.